For brands expanding internationally, managing redirections between multiple expansion stores is key. Geos simplifies this by connecting your Shopify expansion stores and even from other platforms.
Growth planConnect multiple stores is available from Growth plan.
In this article
How it works
How to connect to a Shopify store?
How to connect to a store using other platforms?
Exclude URLs explanation
How it works
When selling globally, merchants often run separate stores for each country or region, sometimes even on different platforms. For example:
store-ca.myshopify.com (Shopify store – Primary store)
store-eu.myshopify.com (Shopify store)
store-asia.com (store on another platform, e.g. WooCommerce)
With Geos, you can connect all these expansion stores—Shopify or other platform—and automatically direct customers to the right store based on their location and preferences.
It also combines the country and language options from all connected stores into a single, unified selector or popup. Customers see all available countries, languages, and currencies without noticing they’re switching between different stores.
You only need to subscribe to Growth plan on one store (the primary store). Connected stores can remain on the Free plan while enjoying the same features as your primary store.
How to connect to a Shopify store?
Connect Shopify store
Copy the code generated in your Primary store.
Open the Connect stores tab in your primary store.
In Connect secondary stores section, click Connect store.
Select Shopify and copy the generated code.
Connect in your expansion store:
Open Geos in the secondary store.
Go to Connect stores on the navigation bar.
Click Secondary store, paste the code from the primary store, and click Connect.
Repeat for all Shopify stores you want to connect.
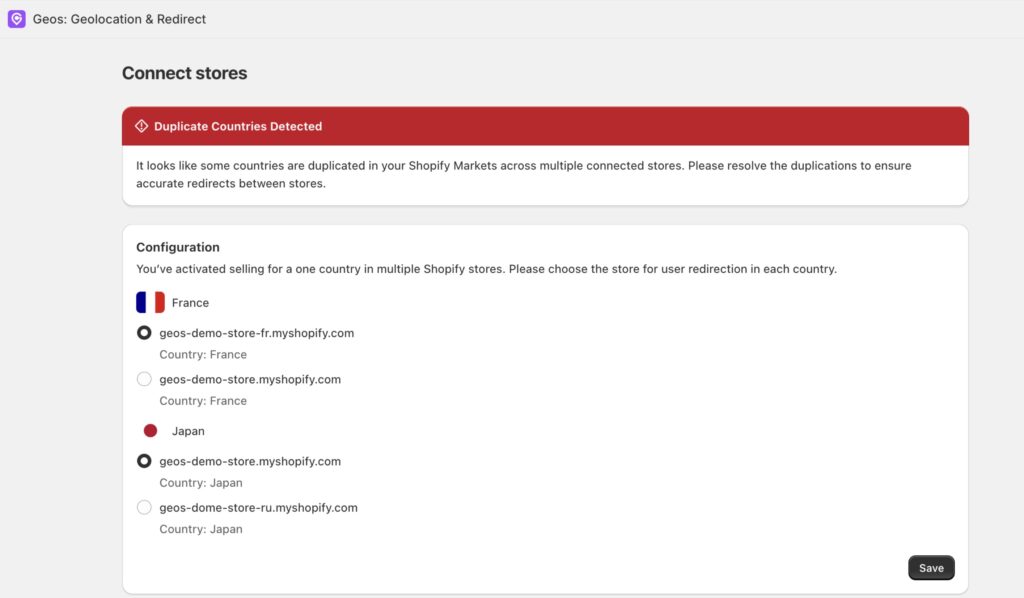
Resolve the duplication issues
Sometimes, multiple stores sell to the same region. This can cause Geos features to work incorrectly.
The system will detect these duplications and let you choose which store handles customer redirects for each country.
Example: If two connected stores both deliver to Canada, you’ll need to select one store to handle Canadian customers.
⚠️ Note: Make sure the Geos code is pasted in all stores before resolving duplications. Geos needs all stores connected to detect conflicts.
Enable the popup in all your stores
Once you’ve connected and synced your markets, make sure to activate the geolocation popup across all your stores. Learn more about customize geolocation popup.
How to connect to a store using other platforms?
In your primary store, go to Connect stores.
In Connect secondary stores section, click Connect store.
Select Other platform
Enter the storelabel,store URL
Add all the countries this store will serve.
For each country, click Edit button to define:
Currency
Supported Languages
Whether the URL changes by country or language
Click Save
4. Enable the popup in all your stores
Once you’ve connected and synced your markets, make sure to activate the geolocation popup across all your stores. Learn more about customize geolocation popup.
This feature allows you to exclude specific URLs from triggering the geolocation popup. This is particularly useful for sensitive pages such as check out page or shared contents, such as blogs, that should be accessible to all users, regardless of their location.
By adding a list of URLs to exclude, you can ensure that users can access these sections without being redirected based on their IP address, ensuring a seamless experience for your customers.